It’s probably no secret that I hate using Eclipse. It’s always been a slow, memory-hungry, nigh-untamable beast. It’s always made my computers feel inadequate, even if they’re perfectly fine for everything else.
After playing around a bit with NetBeans for an embedded systems project using the Nordic Semiconductor nRF5-series chips, I like Eclipse even less.
NetBeans has a great parser for existing Makefile-based projects.
All I had to do was:
- Install NetBeans for C++.
- Unpack the GCC ARM Embedded tools from Launchpad.
- Unpack the tools and the Nordic nRF5 SDK.
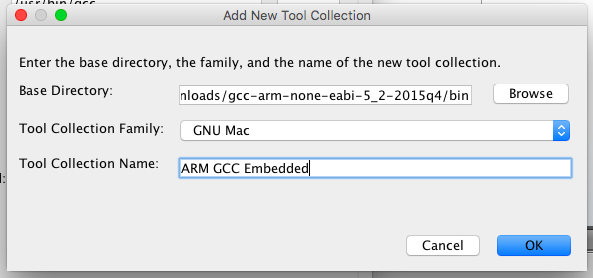
Create a new GCC toolchain in NetBeans:
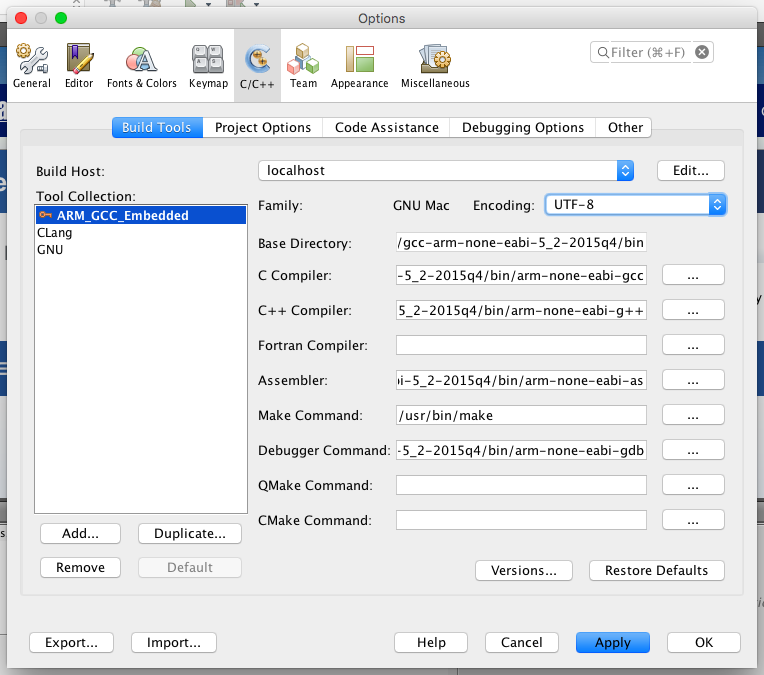
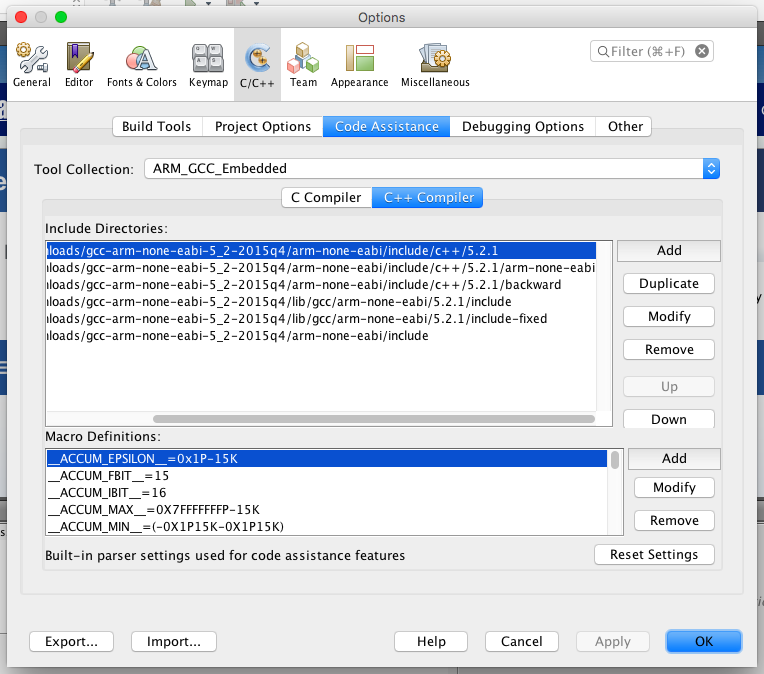
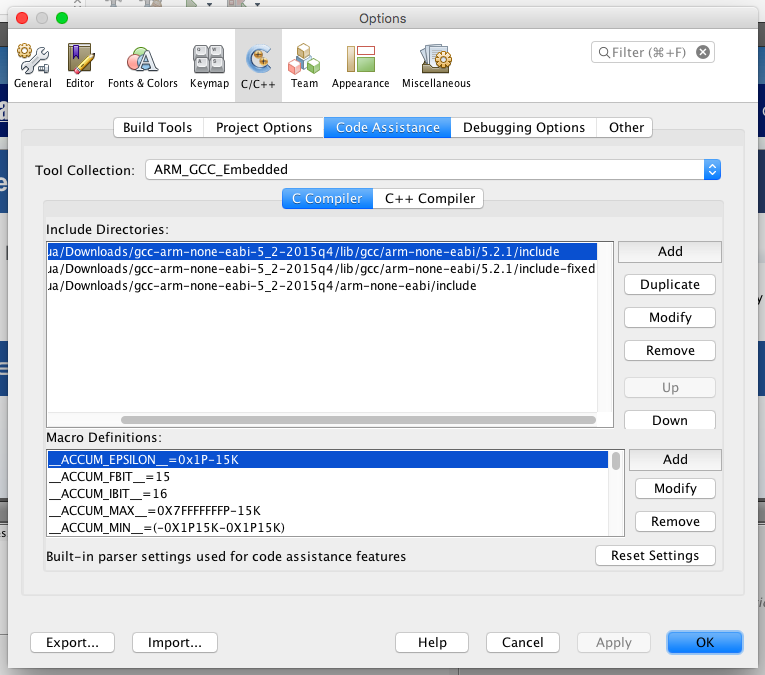
The awesome thing is that as soon as you hit Apply, NetBeans scans the folders around your new toolchain and figures out automatically where the right include folders are:
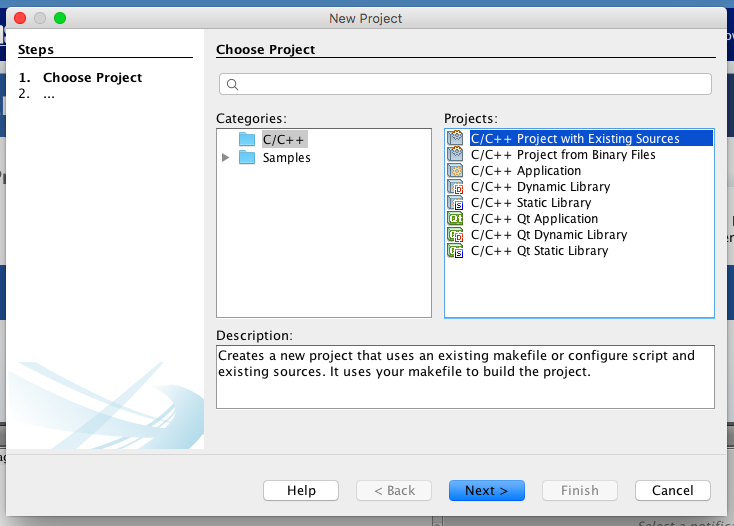
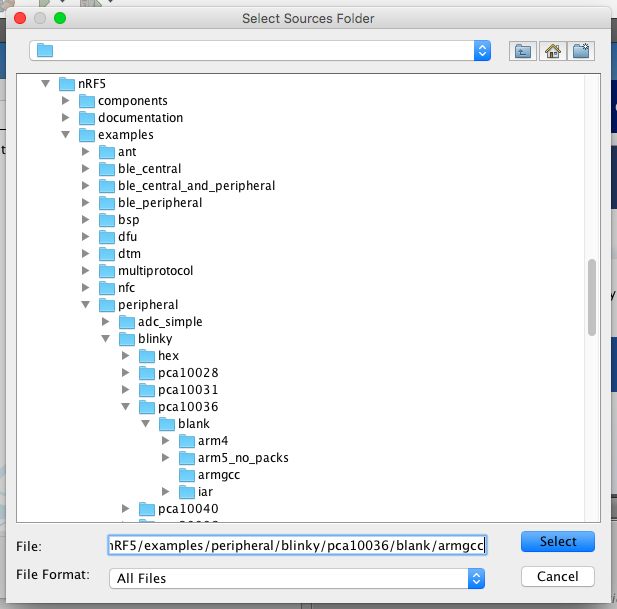
Create a new project using existing Makefile:
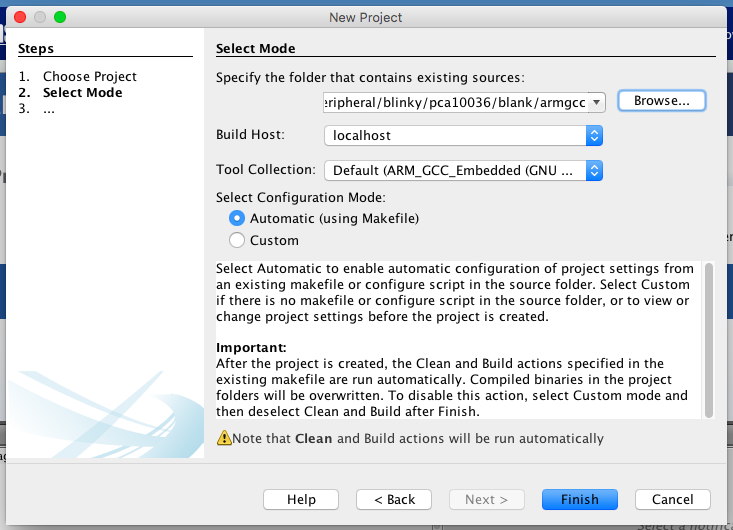
You may get a failure right after the project is imported, NetBeans will attempt to make the Makefile once, in order to automatically detect all of the -D defines, -I include folders, and -L library folders.
cd '/Users/max/Downloads/nRF5/examples/peripheral/blinky/pca10036/blank/armgcc'
/usr/bin/make -f Makefile
rm -rf _build
echo  Makefile
Makefile
mkdir _build
Compiling file: system_nrf52.c
make: /usr/local/gcc-arm-none-eabi-4_9-2015q1/bin/arm-none-eabi-gcc: No such file or directory
make: *** [_build/system_nrf52.o] Error 1

BUILD FAILED (exit value 2, total time: 61ms)
The problem is an incorrect gcc compiler version, which comes from included Makefile settings in the nRF52 SDK.
Open up components/toolchain/gcc/Makefile.posix in the SDK, and change the GNU_INSTALL_ROOT and GNU_VERSION defines to reflect the real version of the GNU tools that you downloaded.
In my case, these are:
GNU_INSTALL_ROOT := /Users/max/Downloads/gcc-arm-none-eabi-5_2-2015q4
GNU_VERSION := 5.2.1
Now delete and re-create the NetBeans project, and it will automatically run the Makefile and create references to the source files used:
cd '/Users/max/Downloads/nRF5/examples/peripheral/blinky/pca10036/blank/armgcc'
/usr/bin/make -f Makefile clean
rm -rf _build

CLEAN SUCCESSFUL (total time: 112ms)
cd '/Users/max/Downloads/nRF5/examples/peripheral/blinky/pca10036/blank/armgcc'
/usr/bin/make -f Makefile
rm -rf _build
echo  Makefile
Makefile
mkdir _build
Compiling file: system_nrf52.c
Compiling file: main.c
Compiling file: nrf_delay.c
Compiling file: gcc_startup_nrf52.s
Linking target: nrf52832_xxaa.out
Preparing: nrf52832_xxaa.bin
Preparing: nrf52832_xxaa.hex

   text	   data	    bss	    dec	    hex	filename
   2464	    108	     28	   2600	    a28	_build/nrf52832_xxaa.out


BUILD SUCCESSFUL (total time: 1s)
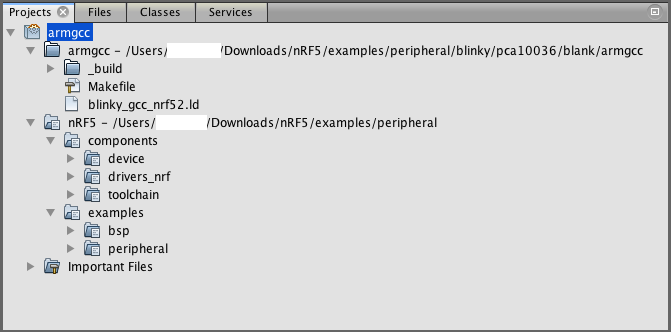
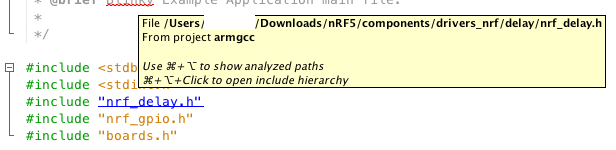
Done! You should see a complete project in the projects window (if not, try deleting the project and re-creating it):
Now Autocomplete and Jump to Source work!
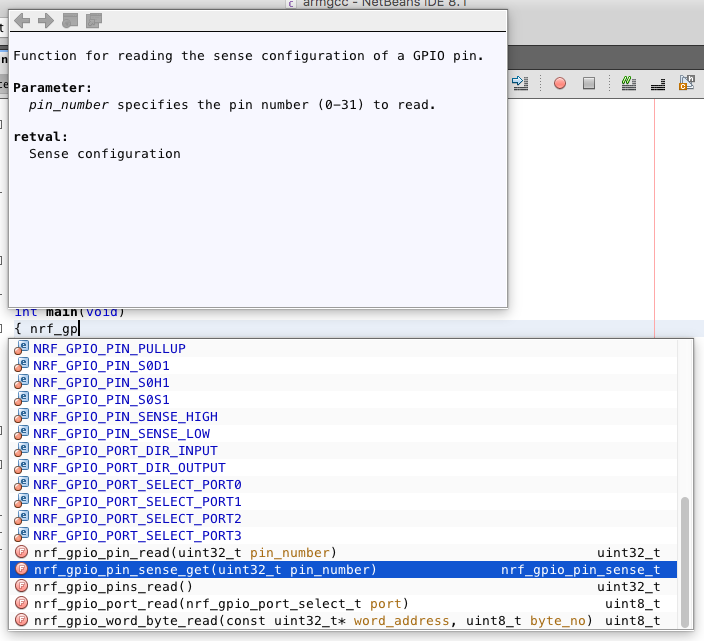
I must’ve spent a day and a ton of googling to figure out this same level of functionality using Eclipse, and even then the autocomplete would usually glitch. Never mind the hard disk thrashing that Eclipse always seemed to give my systems.
Kudos to the NetBeans team for making my day easier!