Summary
Old smartphones make the perfect microservers, they’ve got more than enough horsepower for server tasks, plenty of RAM, and once rooted, full configurability. They’re durable embedded systems, honed to perfection by being produced for the mass-market, with no moving parts and the possibility of decent storage expansion. They’re extremely resource-light, usually utilizing only a few watt-hours per hour, meaning they’ve got battery-backup built right in.
Ubuntu 13.10 on an old smartphone
I had some problems getting various chroot instructions to work completely smoothly on my phone. This writeup is a synthesis of instructions from the references listed at the bottom of this post.
I used gparted to create a clean ext3-formatted Linux partition on an 8 gigabyte SD card. I mounted that partition on the host machine under /mnt and ran the debootstrap command:
HOSTNAME=ubuntu-armhf sudo debootstrap --arch=armhf --variant=minbase --foreign saucy /mnt
Then, I installed the rest of the system in emulation:
sudo apt-get install qemu-user-static qemu-system
sudo cp /usr/bin/qemu-arm-static /mnt/usr/bin
LANG=C sudo chroot mnt /usr/bin/qemu-arm-static -cpu cortex-a9 /bin/bash ./debootstrap/debootstrap --second-stage
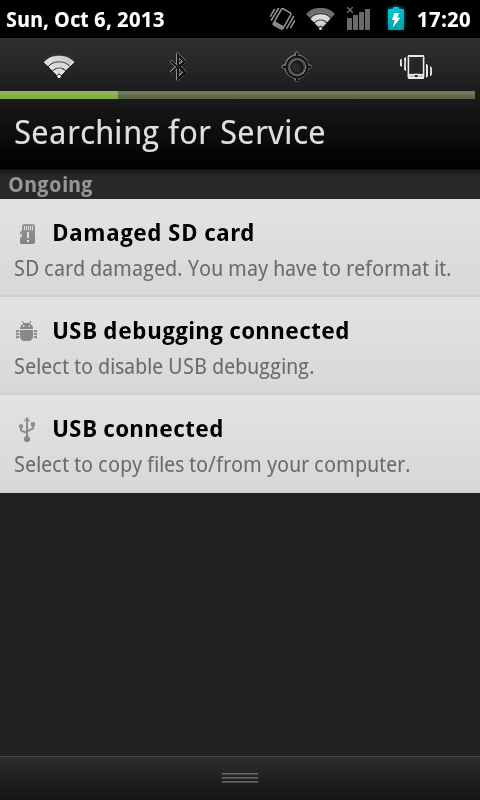
After putting the SD card back into the smartphone, Android complained that the card was messed up:

Which was fixable by logging into the phone’s shell as root and running e2fsck, which checked and fixed filesystem issues it detected on the card:
localhost block # e2fsck /dev/block/mmcblk0p1
e2fsck 1.41.12 (17-May-2010)
chroot-drive contains a file system with errors, check forced.
Pass 1: Checking inodes, blocks, and sizes
Pass 2: Checking directory structure
Pass 3: Checking directory connectivity
Pass 4: Checking reference counts
Pass 5: Checking group summary information
chroot-drive: 8180/489600 files (1.2% non-contiguous), 100332/1957120 blocks
localhost block # e2fsck /dev/block/mmcblk0p1
e2fsck 1.41.12 (17-May-2010)
chroot-drive: clean, 8180/489600 files, 100332/1957120 blocks
After doing this once, the Android system checked the SD card again at the next reboot, and added the following mounts to the /proc/mounts table after each subsequent reboot:
/dev/block/vold/179:1 on /mnt/sdcard type ext4 (rw,dirsync,nosuid,nodev,noexec,relatime,barrier=1,data=ordered,noauto_da_alloc)
/dev/block/vold/179:1 on /mnt/secure/asec type ext4 (rw,dirsync,nosuid,nodev,noexec,relatime,barrier=1,data=ordered,noauto_da_alloc)
tmpfs on /mnt/sdcard/.android_secure type tmpfs (ro,relatime,size=0k,mode=000)
Then I set up a script to log into the chroot environment:
|
|
export SDCARD=/mnt/sdcard
export ROOT=$SDCARD
export PATH=/usr/local/sbin:/usr/local/bin:/usr/sbin:/usr/bin:/sbin:/bin:$PATH
export HOME=/root
mount -o remount,exec,dev,suid $SDCARD
for f in dev dev/pts proc sys ; do mount -o bind /$f $ROOT/$f ; done
chroot $ROOT /bin/bash -l
|
This worked fine, but when running inside the chroot environment the apt-get and apt-key commands didn’t work, because the Domain Name Servers were not specified. (Note: The mount command in the for loop probably also needs some work, as it will mount things multiple times when I leave and reenter the chroot environment.)
I edited the /etc/resolv.conf file and pointed it to Google’s nameservers:
|
|
# vi /mnt/sdcard/etc/resolv.conf |
|
|
nameserver 8.8.8.8
nameserver 8.8.4.4
search local
|
The sources.list file uses ports.ubuntu.com, which might be because the other archive servers don’t have armhf packages to offer. It wasn’t quite clear to me how Ubuntu manages their ports across the various versions.
|
|
root@localhost:/# echo "deb http://ports.ubuntu.com saucy main restricted universe" > /etc/apt/sources.list
root@localhost:/# apt-key adv --keyserver keyserver.ubuntu.com --recv-keys 428D7C01
Executing: gpg --ignore-time-conflict --no-options --no-default-keyring --secret-keyring /tmp/tmp.DuitQkXxTo --trustdb-name /etc/apt//trustdb.gpg --keyring /etc/apt/trusted.gpg --primary-keyring /etc/apt/trusted.gpg --keyserver keyserver.ubuntu.com --recv-keys 428D7C01
gpg: requesting key 428D7C01 from hkp server keyserver.ubuntu.com
gpg: key 428D7C01: public key "Ubuntu Debug Symbol Archive Automatic Signing Key <ubuntu-archive@lists.ubuntu.com>" imported
gpg: no ultimately trusted keys found
gpg: Total number processed: 1
gpg: imported: 1
|
Once the APT source has been added, apt-get update and apt-get install will work fine. It’s a blank slate from there.
squid-deb-proxy-client
For the initial downloads, the following setting can be placed in the APT configuration folder to manually specify an APT package proxy, which might speed up installations:
# vi /mnt/sdcard/etc/apt/apt.conf.d/30proxy
Acquire::http { Proxy "http://192.168.0.132:8000"; };
If the proxy address never changes, you can just leave it at that. If the address does change, you’ll probably want to install the squid-deb-proxy-client package.
References
1. ChrootOnAndroid
2. How to install Ubuntu 13.04 on your Android phone
3. DebootstrapChroot
4. Raspbian Benchmarking – armel vs armhf
5. Installation mit debootstrap
6. Index of /dists/saucy/main
7. Best way to cache apt downloads on a LAN?
